Attempting an Assessment
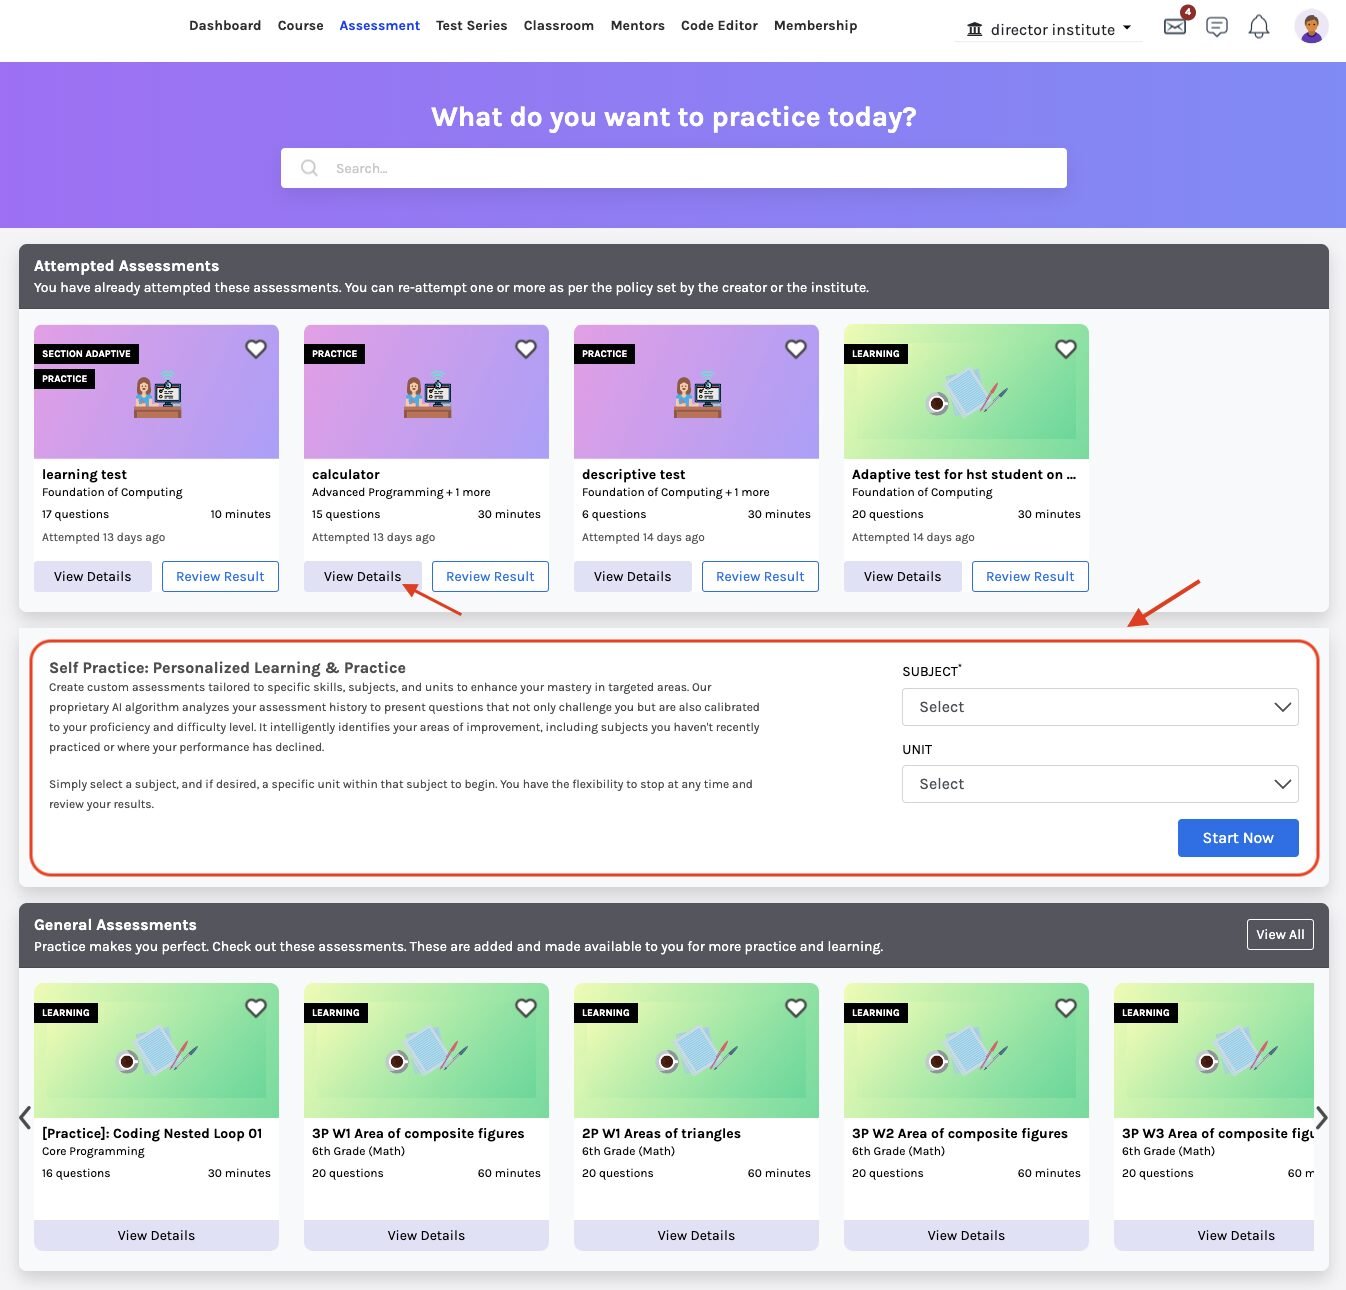
Self Practice: Personalized Learning & Practice
From the Assessment window, you can select the subject you’re interested in and, if desired, a specific unit within that subject. Then, click the ‘Star Now’ button to create custom assessments tailored to specific skills, subjects, and units to enhance your mastery in targeted areas. You have the flexibility to stop at any time and review your results. Click here to learn more.
Attempting an Assessment:
To attempt the available assessment, click the View Details button on your wish assessment.
The following window will be displayed:
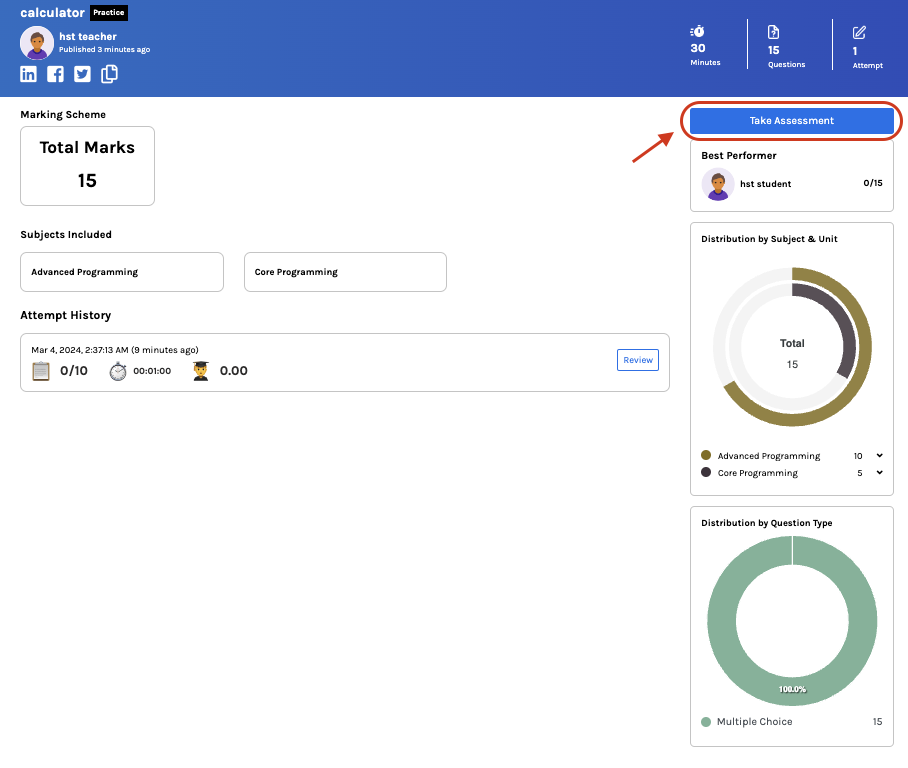
Details of the chosen assessment will also be available here.
You may see the Total marks the assessment carries.
Distribution by Subject & Unit: displays the questions counted from each subject/unit.
Distribution by Question Type: displays the questions counted from each type of question, i.e., MCQs, Fill in the Blanks, Descriptive, etc.
Attempt History: A list of all the previous attempts and the attempts you may take for this assessment will be displayed here.
Click on Take Assessment to start.
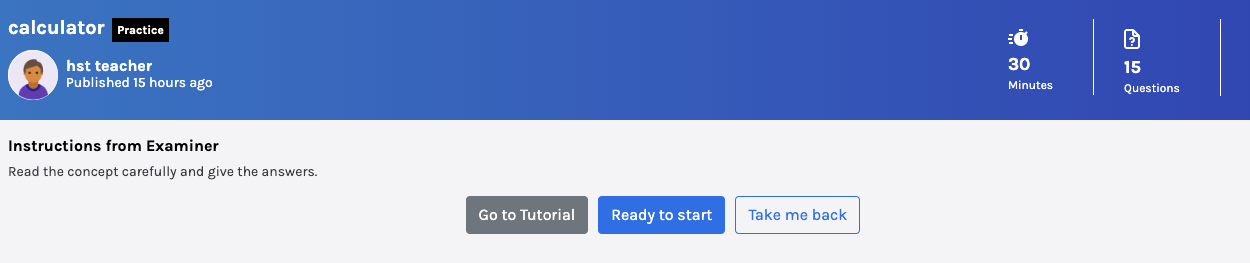
Click on Ready to Start.
To answer the question, click on the appropriate option you may find correct.
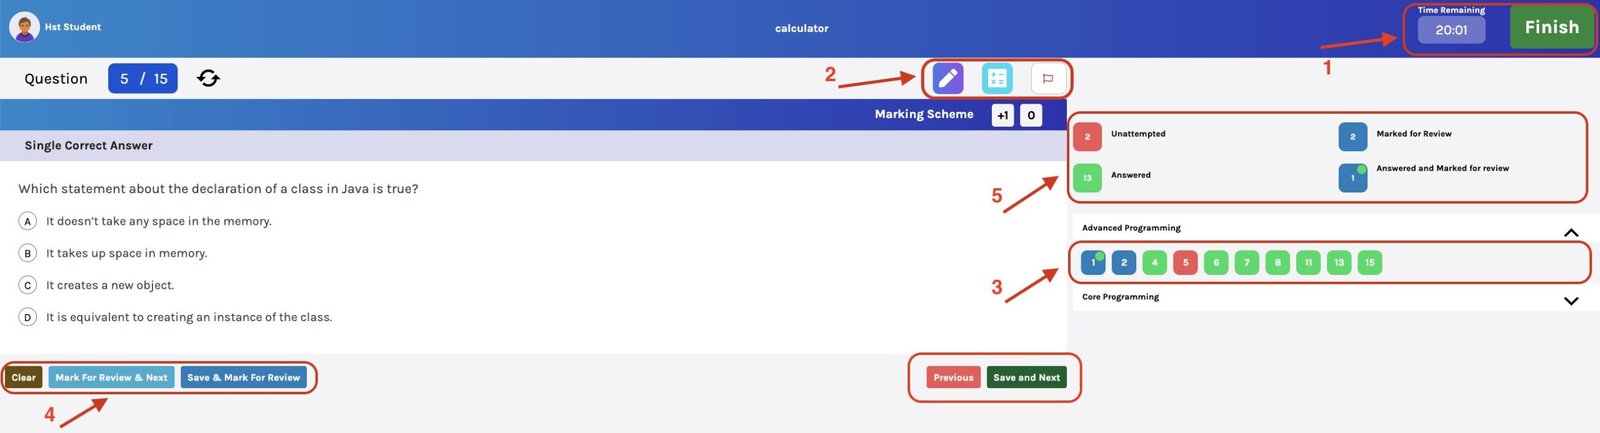
You may see the timer and Finish button to end the assessment at the top of the screen. (Refer to point 1 of the above image)
You can use your screen as a whiteboard to do rough work using the marker and use the calculator if the permissible test. If you find any question incorrect/inappropriate, click the flag icon to report and share your feedback. (Refer to point 2)
The box at the right side of the screen (Refer to point 3) displays the question numbers and your answer to each question. The color coding for the same is given above. (Refer to point 5)
Question numbers are displayed in the following color:
- White: Initially, they’re white in color, meaning you haven’t visited the question.
- Green: Questions have been answered.
- Red: The question is left unattempted.
- Blue: The question is marked for review.
- Blue with a green dot: The question is answered and marked for review; this will be considered for evaluation.
After answering the question, you may choose between Mark For Review & Next or Save & Mark For Review or Clear. (Refer to point 4)
- If you’re unsure about the answer and want to recheck later during the test, click Mark For Review & Next is your option.
- If you’re sure of the answer and want it to be considered for evaluation, click Save & Mark For Review.
- Clear: It deletes your choice.
Click Save and Next to move to the next question.
Finish the Assessment by clicking the Finish button on the top.
Once you finish the assessment, you may check your performance report.