Creating an Assessment
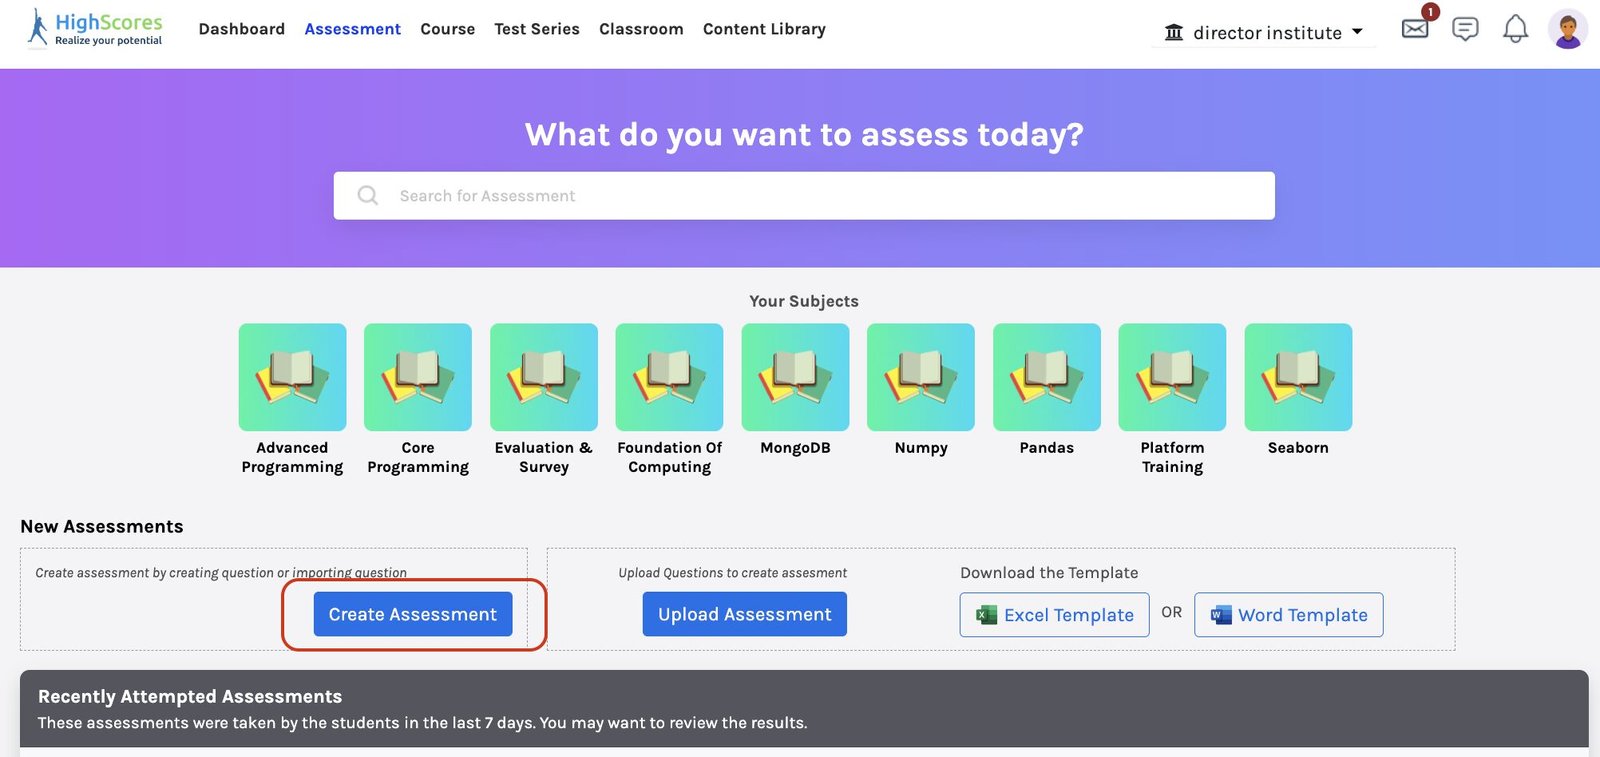
After logging in, your dashboard will be displayed; click on Assessment from the top panel and click on Create Assessment.
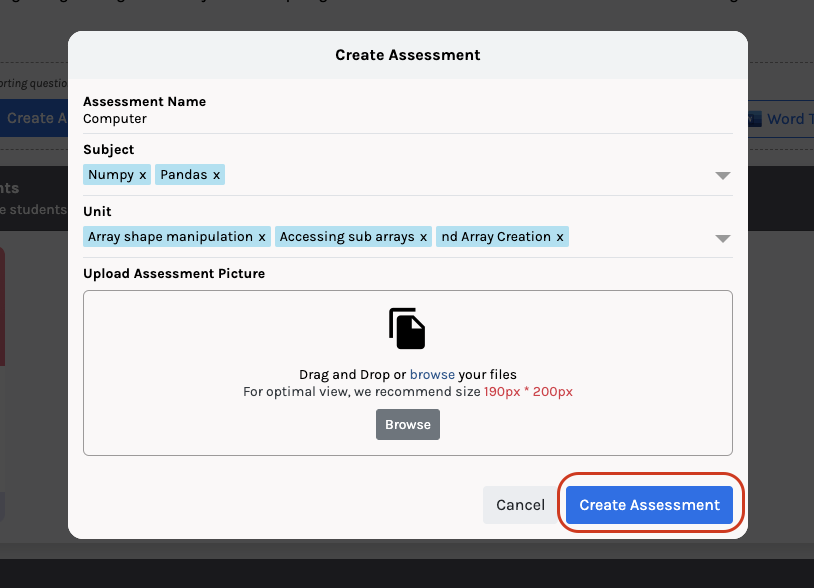
Fill in the details (as shown in the figure below)
Name of the assessment: Enter the assessment name.
Subject: Select the subjects for the assessment; you can select multiple subjects.
Unit: Units are the topics from the subjects you want to create in your assessment. You can select multiple units simultaneously.
Upload Assessment Picture: There is a browse button to upload any assessment image down below. You can drag and drop the file or choose it from your computer and upload it.
Once done, Click on Create Assessment.
Here, you can personalize your assessment based on your requirements.
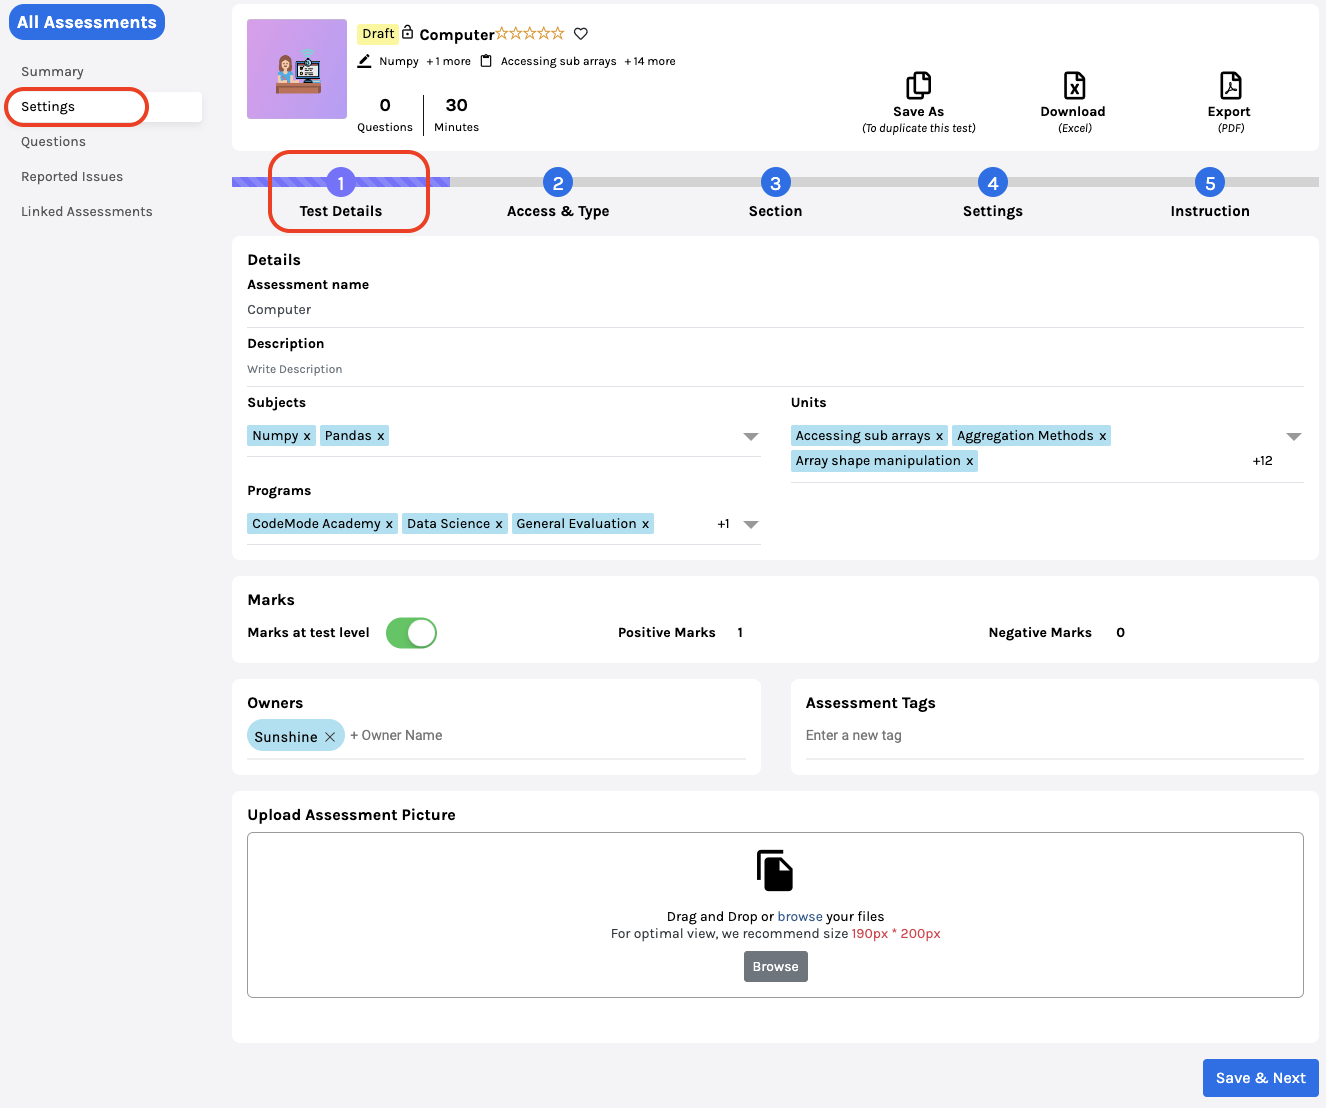
Description: Add the relevant description of your assessment.
Programs: Select the programs for the assessment; you can select multiple programs.
Marks at test level: Disabling this option will allow you to assign different marks to different questions. If enabled, all the questions will carry the same marks.

Positive & Negative marks: Positive marks will be awarded if the answer is correct. Negative marks are the marks deducted for every wrong answer. You can choose the marks using the pointers or typing beside the headings.
Owners: If you wish to make your assessment accessible to any other teacher from your Institute, you can add them to the owner’s sections simply by typing their registered name.
Upload Assessment Picture: If you wish to upload any assessment picture, you can drag and drop the file or click the Browse button to select the file from your system and upload it.
Once done, click Save & Next on the bottom right of the page.
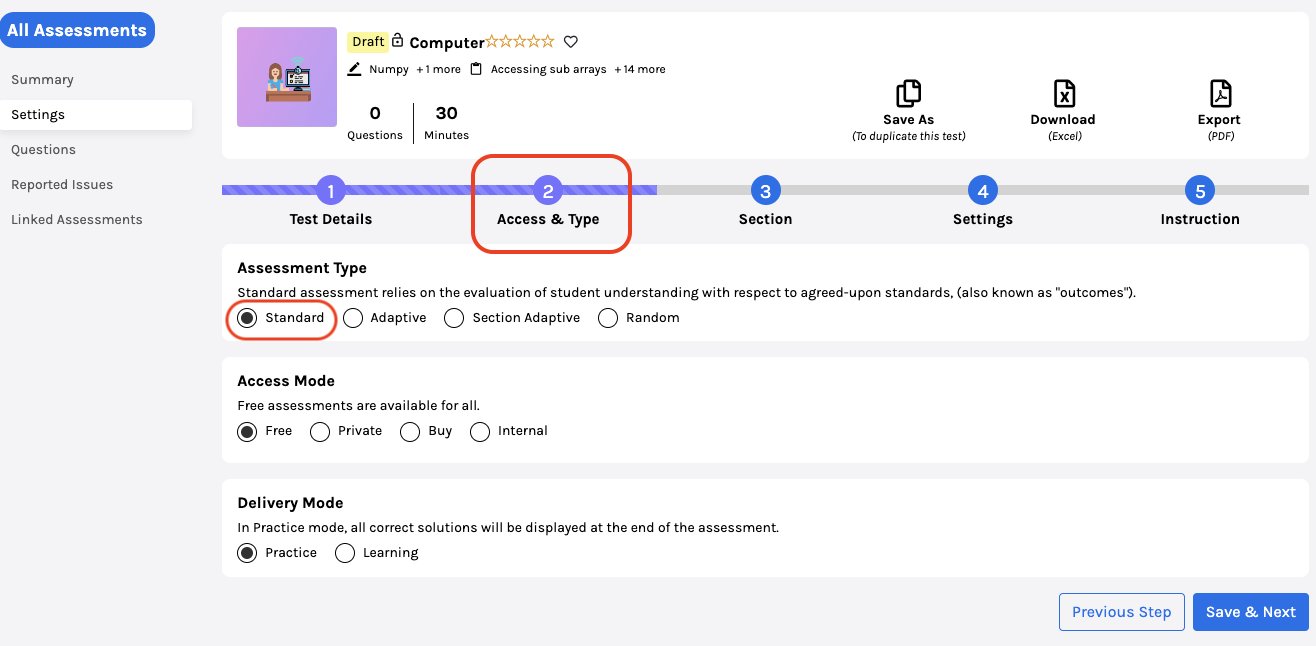
Assessment type: Four Assessment types are available; you must choose one that fits your needs.
Standard: The test starts, and students can attempt all the questions in order.
Adaptive: In this mode, the system increases the difficulty of questions based on the answers provided by the student. The difficulty level may increase for every correct answer, and the difficulty level may decrease for every wrong answer.
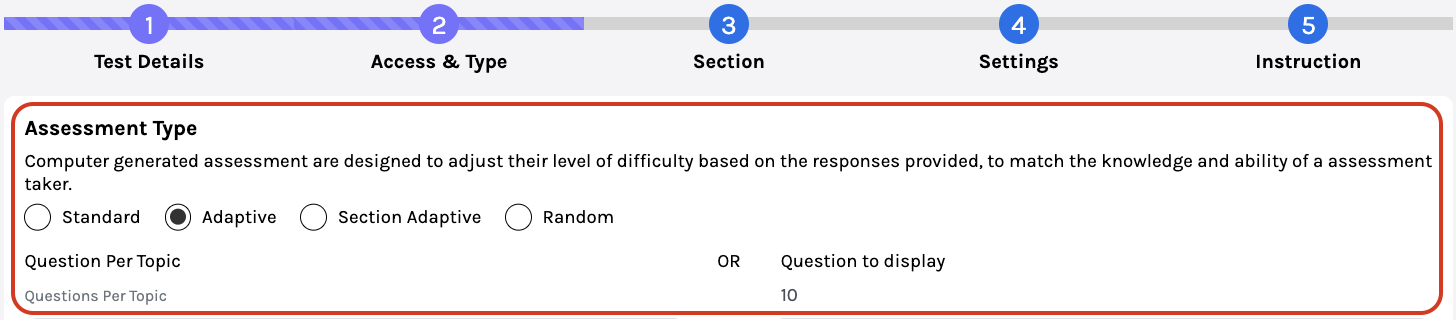
You must choose between questions per topic or total questions to display.
Section Adaptive: Select this assessment type for full-length Digital SAT. The first section is static, and based on the performance of the first section, the second section questions are created.
Random: It means the question will appear in any random order. You need to select the number of questions you wish to have from the units you selected earlier using the drop-down menu. To learn more about how to create a random assessment, click here.

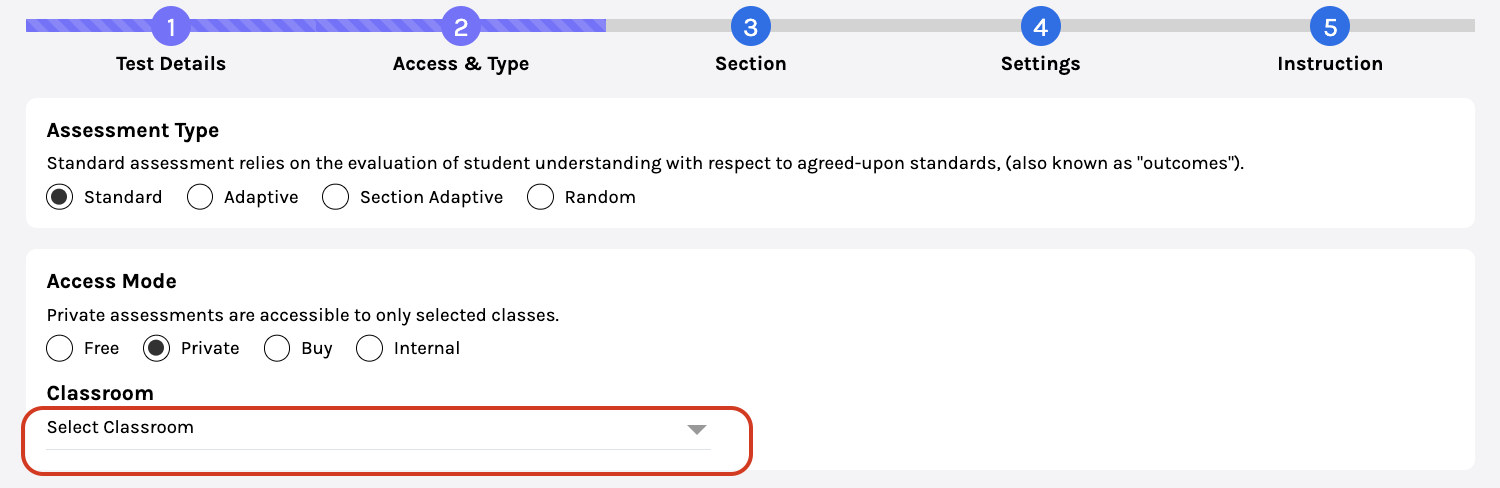
Access Mode: It allows you to choose how you wish your assessment to be accessible. You can only choose one option.
Free: The assessment will be available to everyone.
Private: The assessment will only be available to the classrooms you’ve chosen. You can choose the classrooms from the drop-down menu.
Buy: The assessment will require to be bought before one can attempt it.

Individual Price: It is the price at which it’ll be available for students to buy.
Institutional Price: It is the price at which other teachers/institutions can buy your assessment.
Internal: This mode of assessment can only be part of the Courses and Test Series. So, when we need to use assessment in a Course or Test series, we must keep it in internal mode.
Delivery Mode: It allows you to choose how you want your assessment to reach the students. You can only choose one option.
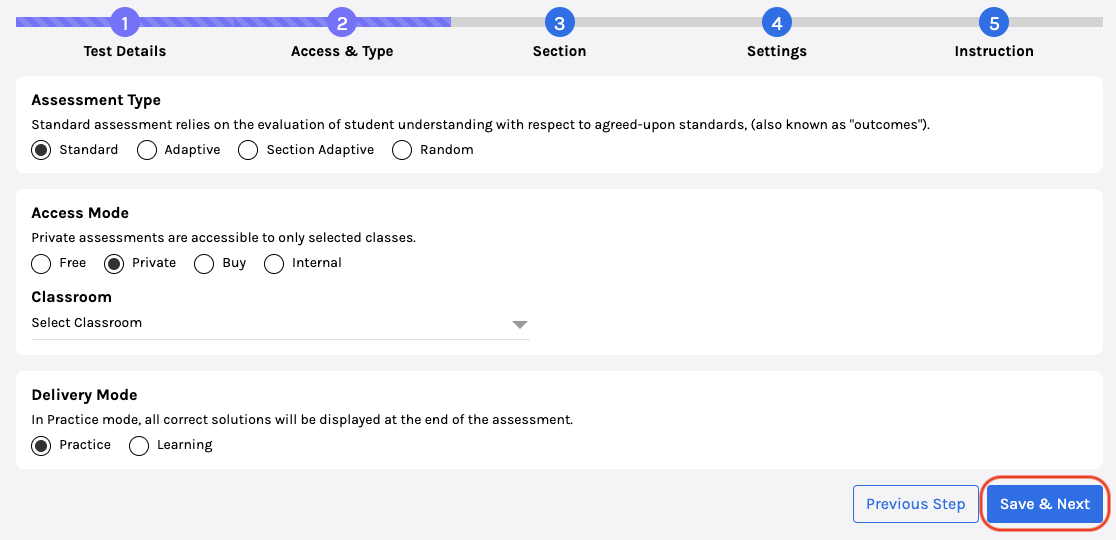
Practice: The test is attempted, and the solutions are displayed at the end of the assessment.
Learning: The solution to each question is displayed after the student attempts it.
Once done, Click Save and Next.
Here, you can create sections for your assessment.
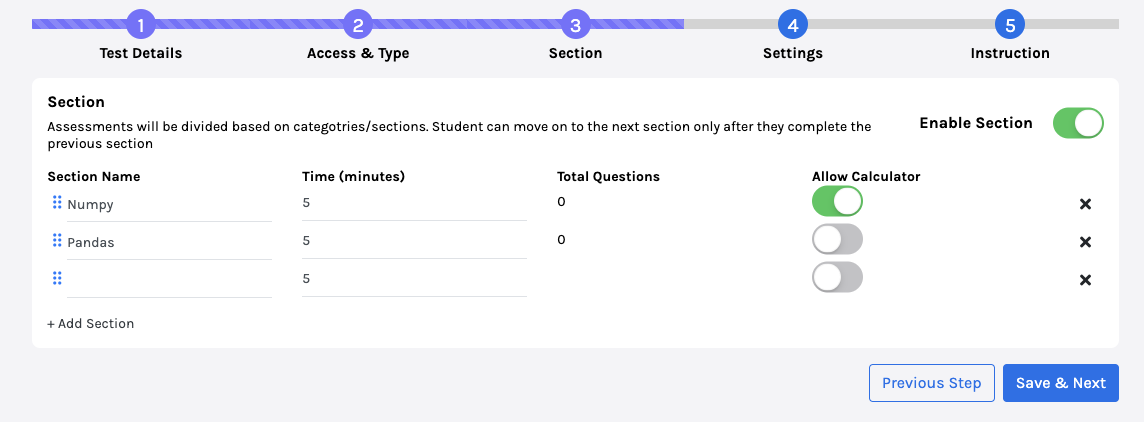
Select Enable Section. Then, you can add as many sections as you want by clicking the Add Section button.
For each section, you must give a time limit (in minutes) and permission to use a calculator. Total Questions is the number of questions in a section; it is calculated automatically.
Once done, Click Save and Next.
General Assessment settings are available here.
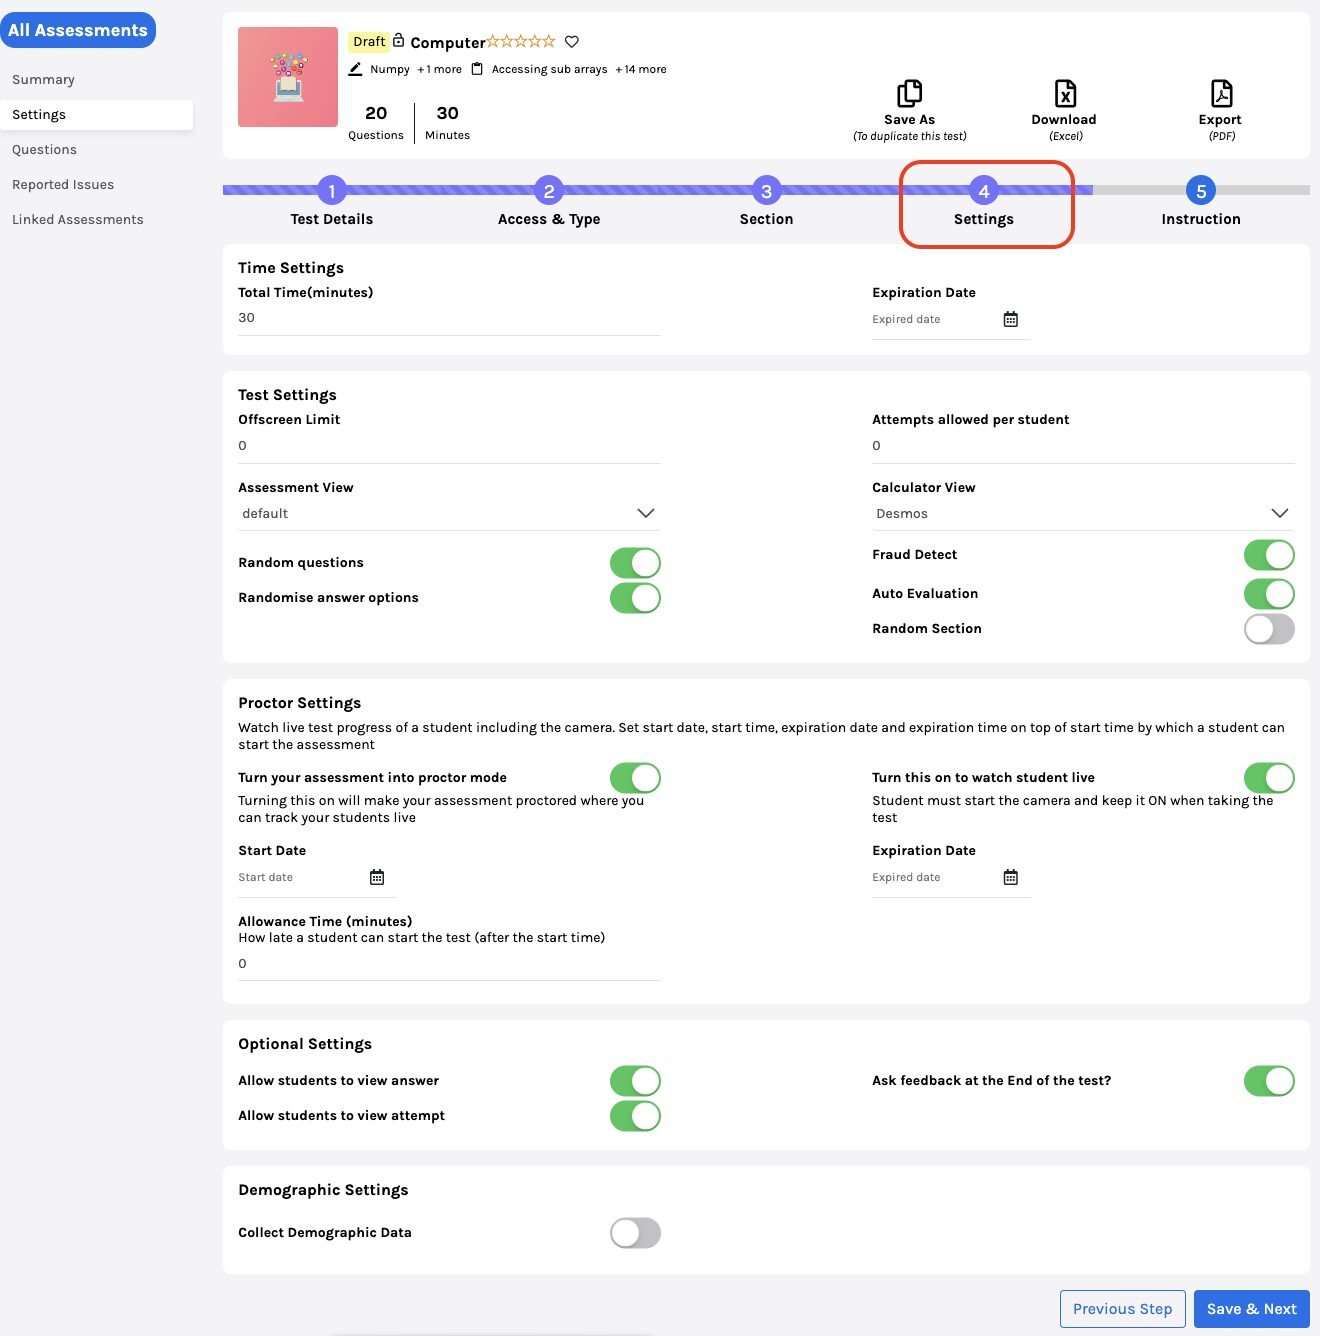
Time settings: Here, you can allot the total time for the assessment, the expiration date, when is the last date to attempt the test.
Test settings:
- Offscreen Limit: Allows you to control the number of times the student visits another window/screen/tab on their system while attempting the test.
- Attempts Allowed: No. of times the assessment can be attempted. If kept at Zero, the assessment can be attempted infinite times.
- Assessment View: You can select a different view (SAT/ACT/default).
- Random questions: The questions appear in random order for students.
- Randomise answer options: The options in the answers will also be shuffled.
- Calculator View: You can permit students to use a calculator with Desmos/Scientific view.
- Fraud Detect: Detect if students try to cheat.
- Auto Evaluation: The assessment will be auto-evaluated, and the result will be generated.
- Random Section: The Sections will be shuffled (only if sections are created).
Proctor Settings: Watch the live test progress of a student including the camera. Set start date, start time, expiration date, and expiration time on top of the start time by which a student can start the assessment.
- Turn your assessment into proctor mode: Turning this on will make your assessment proctored where you can track your students live.
- Turn this on to watch student live: The student must start the camera and keep it ON when taking the test.
- Allowance Time: How late a student can start the test (after the start time).
Optional Settings:
- Ask for feedback: Requests feedback from the students after the assessment.
- View attempt: Allow students to view their attempts after the exam.
- View answer: Students can view the answers after completing the assessment.
Demographic Settings: You may want to collect certain data from the students who attempted the assessment; you may do so using the demographics.
Once done, Click on Save and Next.

Instructions: All the instructions regarding the assessment shall be written here. These will be visible to the Students.
Internal Notes: Here, you can write the notes/guidelines/instructions for the teachers with access to the assessment.
Once finished, click Save to save as a Draft or Publish.
Publish makes the assessment live for the students to attempt, while Draft assessments are saved for further alterations and can be published later.
Once the assessment is created, click on Questions from the left side menu, then click on the Import Questions option.
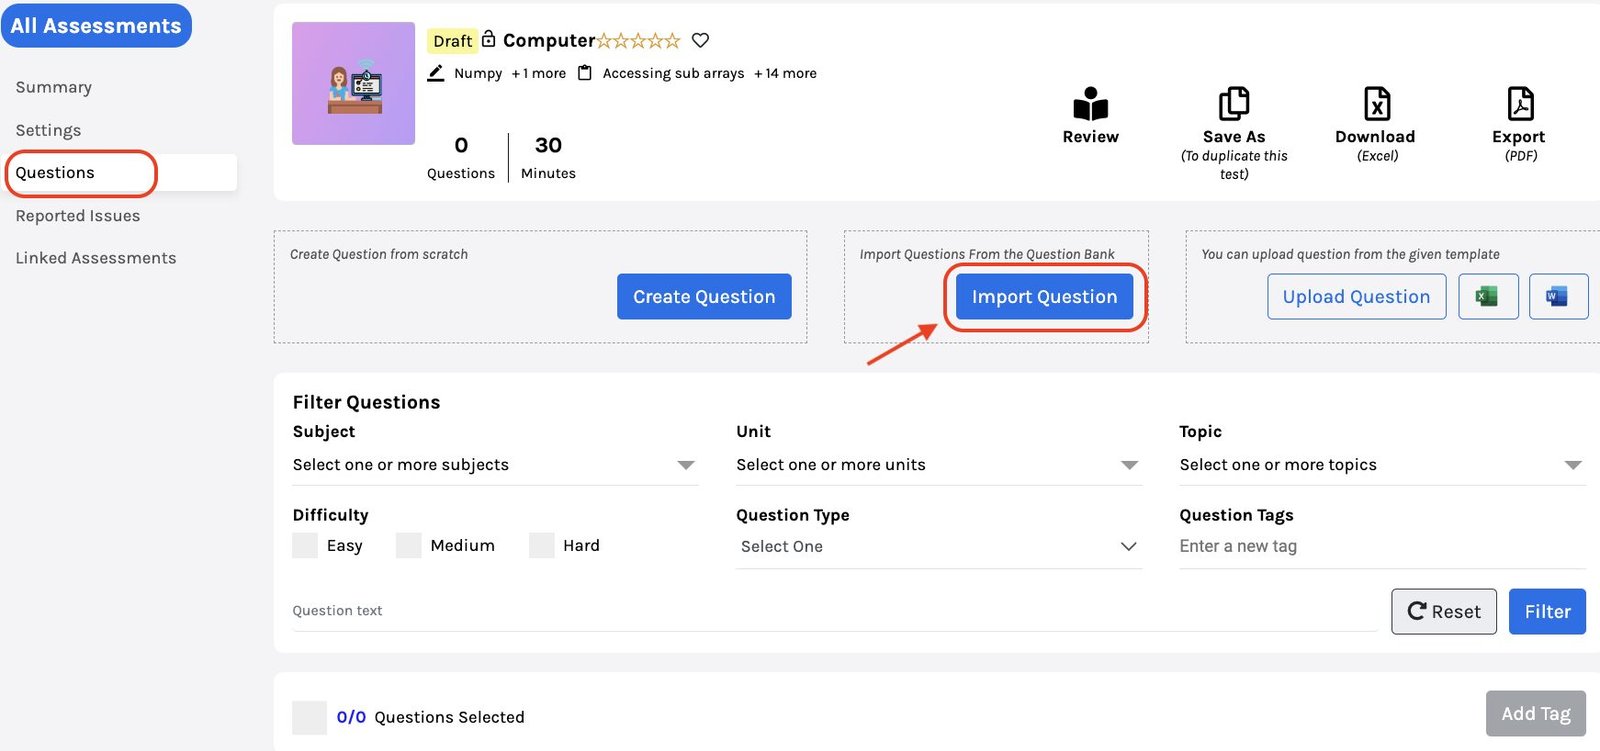
Choose your desired filters to filter the questions from the existing question banks.

To do this:
Select all the Units you wish to have questions on; you can select multiple units.
Now select Topics from the drop-down menu; you can choose multiple topics.

Question Type: You can choose between the categories of questions you wish to filter. There are five categories: Multiple choices, Fill in the blanks, Coding, Descriptive and Mismatch.
Difficulty: It is used to filter questions based on their difficulties.
Show active only: Shows questions that are currently being used in other assessments and question banks.
Search my question only: Refers to the category of questions you have saved for assessments previously.
Once filters are done, click on the Filter button.
A list of all the questions will appear; you can select one by clicking on the box beside the serial number.

Once selected, scroll down the page and click on “Continue”, a list of selected questions will appear.
Once reviewed, you can import these questions by clicking on the Import button at the bottom right of the page.
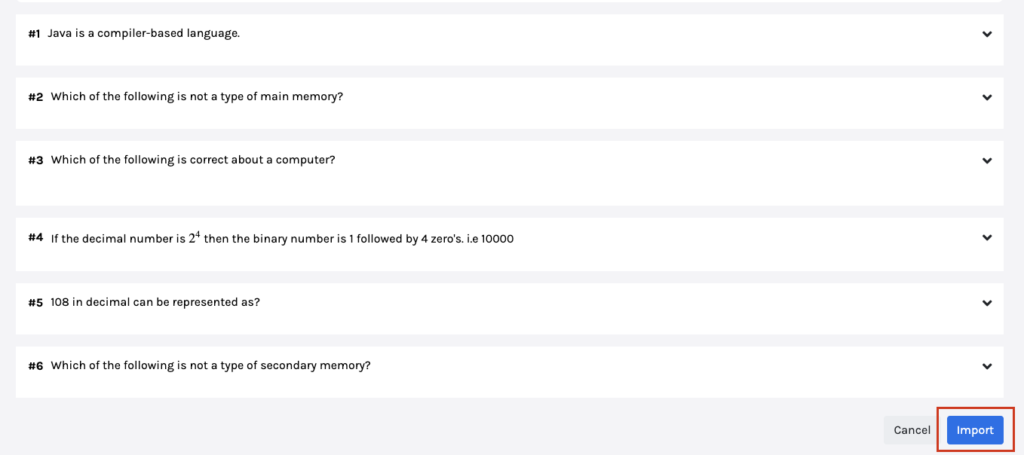
Congratulations!! You have now imported the questions.