-
Tutor/Teacher
-
- Assessment Settings
- Create a Section-wise Assessment
- Creating a proctored assessment.
- Creating a Random Assessment
- Creating an Adaptive Assessment
- Creating an Assessment
- Creating an Audio Question
- Creating Questions for Assessment.
- Download the Results
- Duplicate Assessment
- Evaluating attempts of Students
- Review questions of an assessment
- Review Student’s results and attempts
- Sharing Assessment URL
- Upload Questions using an Excel template
- Upload Questions using Word Template
- Show Remaining Articles (1) Collapse Articles
-
Student
-
- Answering Descriptive Questions
- Attempt Assessment using URL
- Attempt Fill In The Blank Question
- Attempting a Section-Adaptive Assessment
- Attempting an Assessment
- Attempting Coding Question
- Creating a proctored assessment.
- Creating an Adaptive Assessment
- Learning Assessment
- Review the results and get recommendations
-
Parent / Mentor
-
Publisher
-
- Assessment Settings
- Create a Section-wise Assessment
- Creating a proctored assessment.
- Creating a Random Assessment
- Creating an Adaptive Assessment
- Creating an Assessment
- Creating an Audio Question
- Creating Questions for Assessment.
- Duplicate Assessment
- Sharing Assessment URL
- Upload Questions using an Excel template
- Upload Questions using Word Template
-
Institute/Director
-
Admin
Upload Questions using an Excel template
Assessments carry a variety of questions, and creating questions one by one could be a tedious task.
To resolve this problem, we suggest using templates that can be downloaded from the website and, once completed, can be uploaded back to create the set of questions without spending much time.
Follow the steps below to learn how to create questions using an Excel template:-
After logging in, your dashboard will be displayed; click on Assessment from the top panel.
Click on the Excel template to download the template.
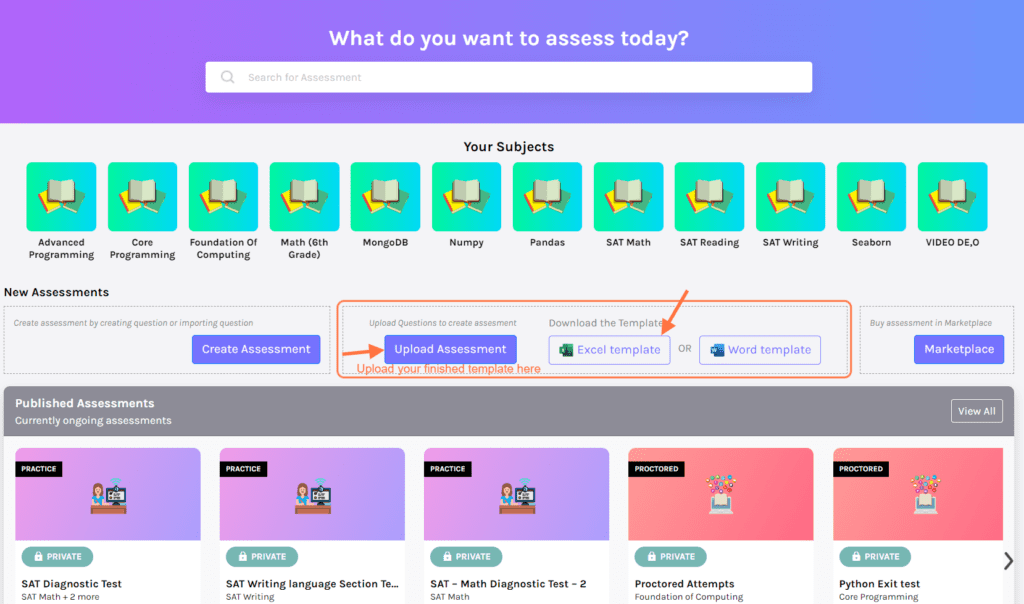
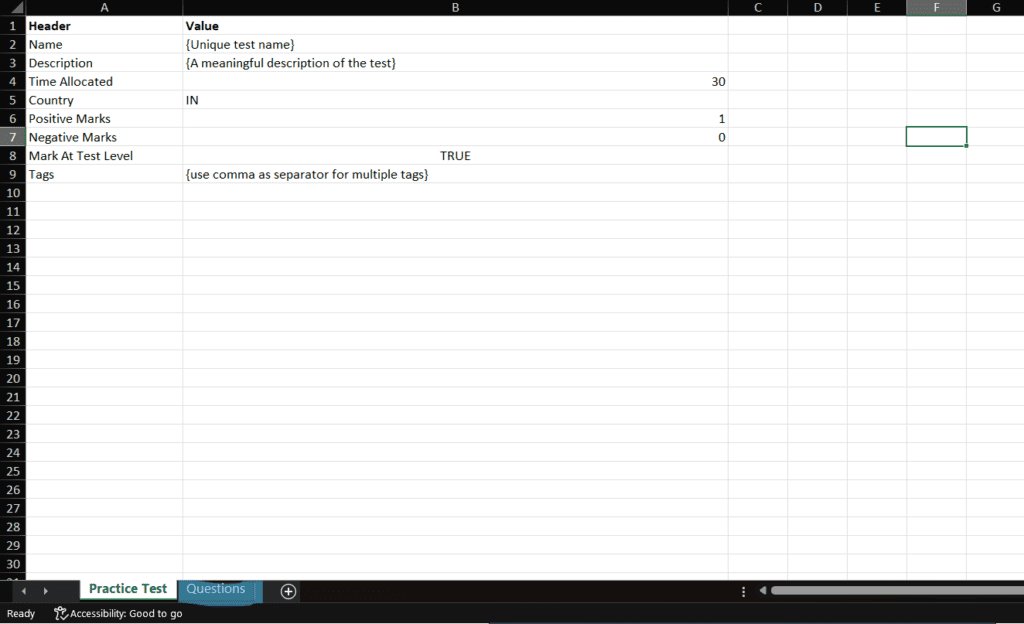
About Excel template:
Open the Excel file on your system.
The sheet contains two pages.
The First page that opens consists of Details of the assessment.
Name: Enter the name of the assessment.
Description: Add the relevant description of the assessment.
Time allocated: Enter the time to complete the assessment.
Country: Enter your country IN for India and US for the United States.
Positive & Negative marks: Positive marks will be awarded if the answer is correct. Negative marks are the marks reduced for every wrong answer. Negative marks should be entered with a (-) sign to avoid errors.
Marks at test level: Writing FALSE in this option will allow you to assign different marks to different questions. If written TRUE, all the questions will carry the same marks.
Tags: They’re optional; if you want the questions to belong to a category, name that category using tags. For multiple tags, use commas as a separator.
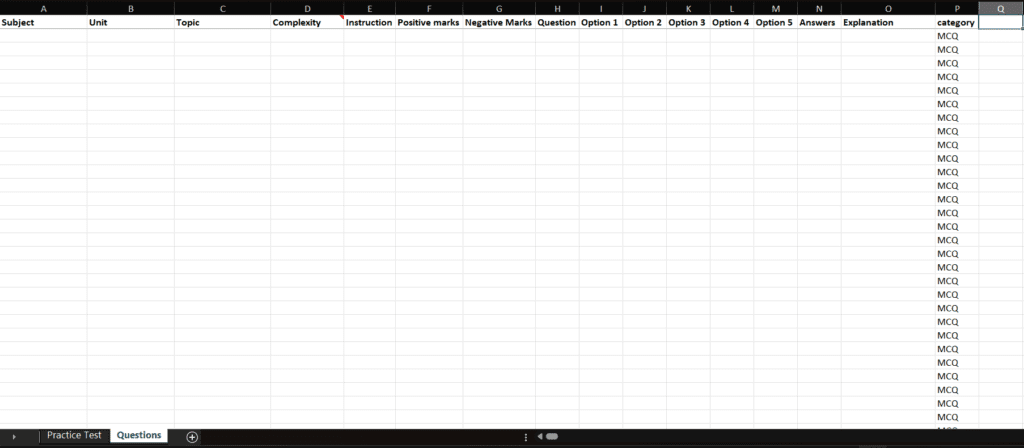
Filling the sheet:
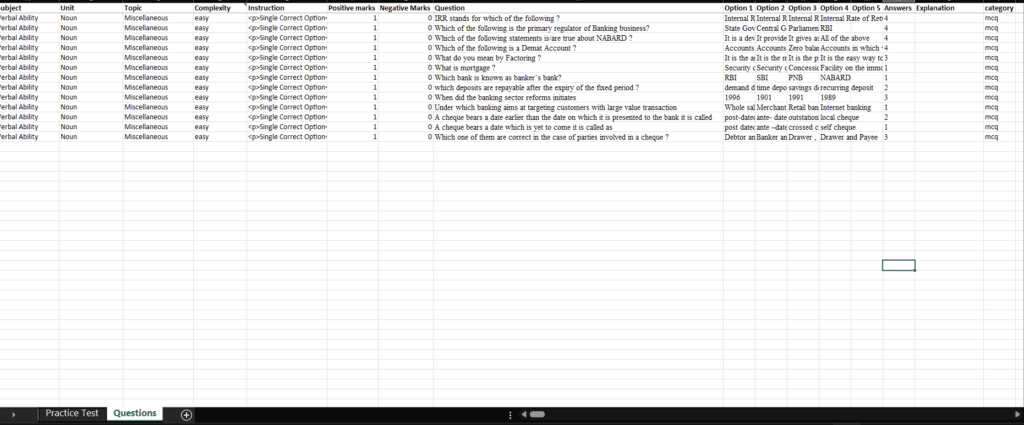
The second page consists of the questions.
Fill in the details:
Subject: Enter the name of the subject from which the question belongs.
Unit: Enter the name of the unit from which the question belongs.
Topic: Enter the name of the topic from which the question belongs.
Complexity: Easy, Moderate, Difficult.
Instructions: Write the instruction/prerequisites for students before they attempt the question.
Question: Enter the question.
Note: No media files can be added while using the excel template.
Options: Fill in the Options; you can have at most Five options for each question.
Answer: Declare the answers here.
Explanation: Mention any necessary explanation for the answer.
Category: Write MCQ, fib, or descriptive.
MCQ refers to Multiple Choice Questions; FiB refers to Fill in the Blanks, and descriptive means, the questions that require detailed text answers.
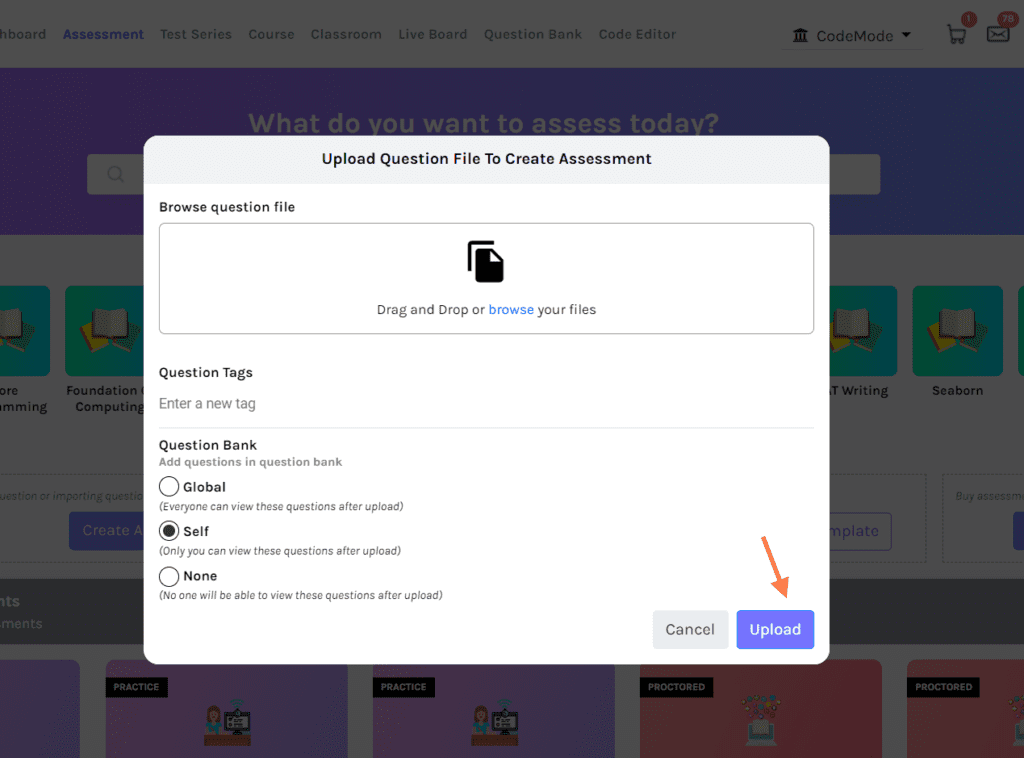
Save the Excel file and go to the website and click on Upload. (Refer to Image-1 down below.)
Drag and drop the file or choose it from your computer and upload it. (Refer to Image-1)
Select the Question bank you wish to add the questions.
-
- Global: Available to all the teachers in your institute
-
- Self: Available to you only.
-
- None: The questions added can be used once only
Click on Upload.
