-
Tutor/Teacher
-
- Assessment Settings
- Create a Section-wise Assessment
- Creating a proctored assessment.
- Creating a Random Assessment
- Creating an Adaptive Assessment
- Creating an Assessment
- Creating an Audio Question
- Creating Questions for Assessment.
- Download the Results
- Duplicate Assessment
- Evaluating attempts of Students
- Review questions of an assessment
- Review Student’s results and attempts
- Sharing Assessment URL
- Upload Questions using an Excel template
- Upload Questions using Word Template
- Show Remaining Articles (1) Collapse Articles
-
Student
-
- Answering Descriptive Questions
- Attempt Assessment using URL
- Attempt Fill In The Blank Question
- Attempting a Section-Adaptive Assessment
- Attempting an Assessment
- Attempting Coding Question
- Creating a proctored assessment.
- Creating an Adaptive Assessment
- Learning Assessment
- Review the results and get recommendations
-
Parent / Mentor
-
Publisher
-
- Assessment Settings
- Create a Section-wise Assessment
- Creating a proctored assessment.
- Creating a Random Assessment
- Creating an Adaptive Assessment
- Creating an Assessment
- Creating an Audio Question
- Creating Questions for Assessment.
- Duplicate Assessment
- Sharing Assessment URL
- Upload Questions using an Excel template
- Upload Questions using Word Template
-
Institute/Director
-
Admin
Creating a Course
Courses are a great way to structure the learning path for students. A course allows students to learn the subject in a structured way, along with the guidance of teachers/educators. A course may consist of multiple subjects/units and is specifically designed to improve the student’s knowledge, and attempting them develops students’ cognitive abilities.
After logging in, your dashboard will be displayed. Click on Course from the top panel.
Next, click on Create Course.


Enter the Details:
Course Name: Enter the name of your course.
Subject Name: You can select multiple subjects from the drop-down menu.
Summary: Enter a brief detail of your course.
You can add the course cover picture using drag-drop or upload it from your system.
Click on the Create Course button.
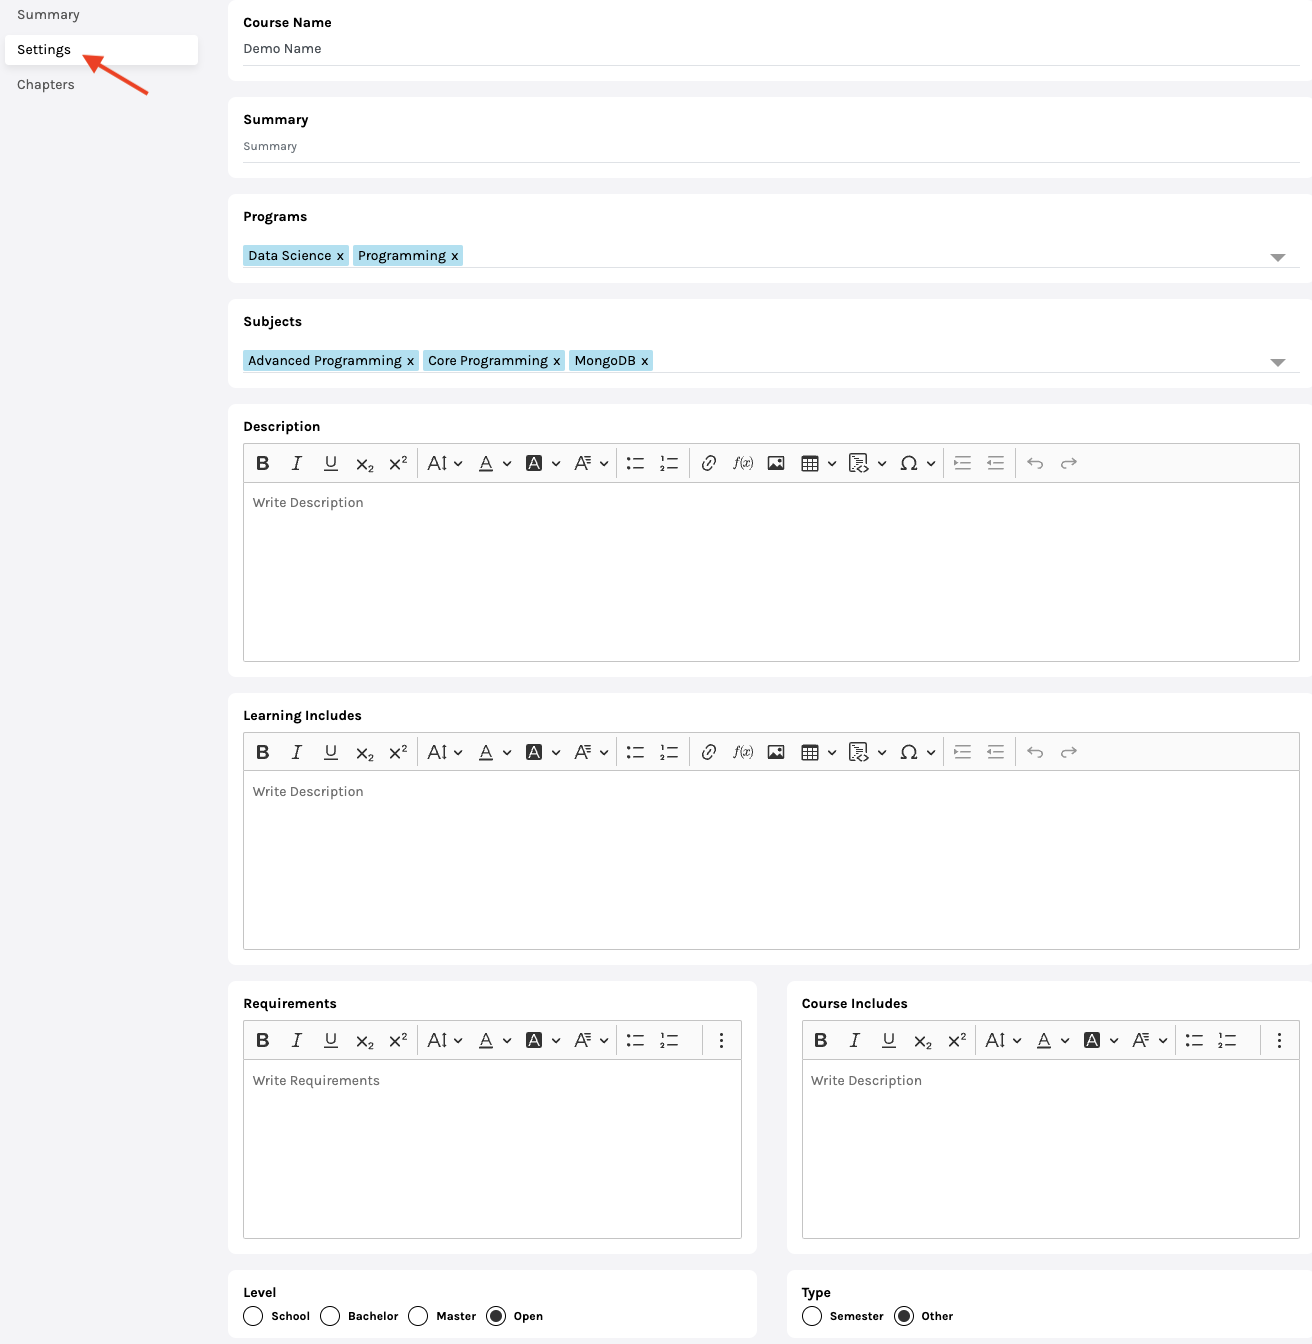
On a new window displayed, click Settings from the left-hand menu.

Next, enter the details:
Description: Write the course description.
Learning Includes: Tells about what students will learn after finishing this course.
Requirements: Mention the requirements needed before attending this course
Course Includes: Mention what subject/topic the course contains.
Level: Tells who can attend the course.
-
- Open means anyone, irrespective of their qualification, can attempt the course.
-
- School/Bachelor/Master refers to the minimum qualification needed to take the course.
Type: Select the type of course, whether it is semester-wise or not.

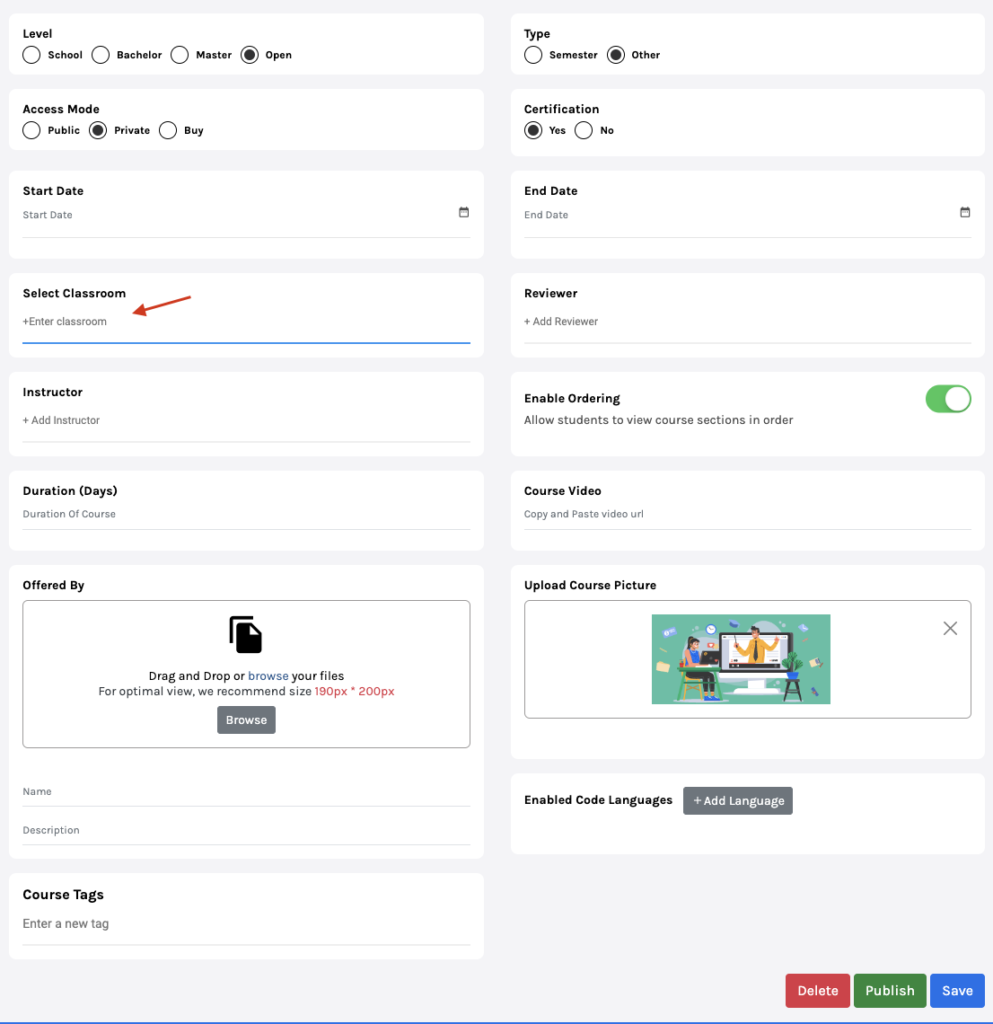
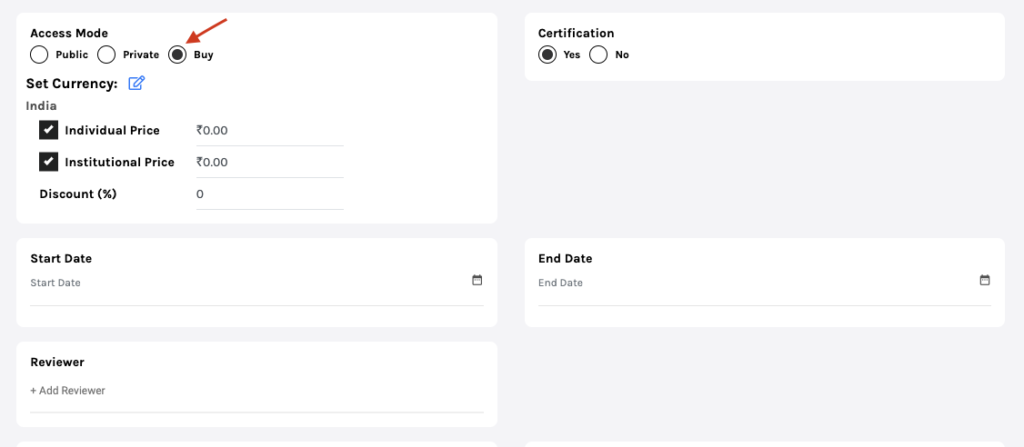
Access mode:
-
- Public: The course will be available to everyone.
-
- Private: The course will only be available in your chosen classrooms. You can choose the classrooms from the drop-down menu.
-
- Buy: The course will require to be bought before one can attempt it.

-
- Individual Price: It is the price at which it’ll be available for students to buy.
-
- Institutional Price: The price at which other teachers/institutions can buy your course.
Certification: Select if the course comes with certification or not.
Start/End Date: Dates between which the course will be available.
Reviewer: Add the reviewer by typing their name in the column; you can add more than one reviewer.
Instructor: Add the instructor by typing their name in the column; you can add more than one instructor.
Enable ordering:
-
- Enabling this feature will allow students to attempt courses in order. For example, Students can attempt Chapter Two, of course, only if they finish Chapter One and so on.
-
- When Disabled: Students can attempt the course chapters in any order.

Duration: Enter the days the course needs to be completed.
Course Video: If there’s any video detailing the course, the link to that video should be pasted here.
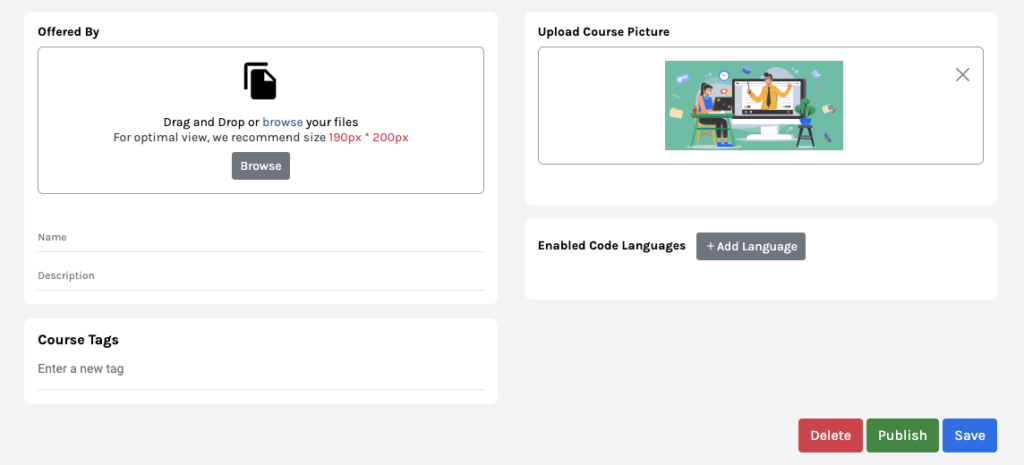
Offered by: Enter the details:
-
- Name of teacher/institution who offered the course.
-
- Description of the course.
-
- Add any media file (optional).

Upload the course picture and enter any Course Tags. Next, click on the Save/Publish button.
Congratulations!!! Your course is now ready.

