-
Tutor/Teacher
-
- Assessment Settings
- Create a Section-wise Assessment
- Creating a proctored assessment.
- Creating a Random Assessment
- Creating an Adaptive Assessment
- Creating an Assessment
- Creating an Audio Question
- Creating Questions for Assessment.
- Download the Results
- Duplicate Assessment
- Evaluating attempts of Students
- Review questions of an assessment
- Review Student’s results and attempts
- Sharing Assessment URL
- Upload Questions using an Excel template
- Upload Questions using Word Template
- Show Remaining Articles (1) Collapse Articles
-
Student
-
- Answering Descriptive Questions
- Attempt Assessment using URL
- Attempt Fill In The Blank Question
- Attempting a Section-Adaptive Assessment
- Attempting an Assessment
- Attempting Coding Question
- Creating a proctored assessment.
- Creating an Adaptive Assessment
- Learning Assessment
- Review the results and get recommendations
-
Parent / Mentor
-
Publisher
-
- Assessment Settings
- Create a Section-wise Assessment
- Creating a proctored assessment.
- Creating a Random Assessment
- Creating an Adaptive Assessment
- Creating an Assessment
- Creating an Audio Question
- Creating Questions for Assessment.
- Duplicate Assessment
- Sharing Assessment URL
- Upload Questions using an Excel template
- Upload Questions using Word Template
-
Institute/Director
-
Admin
Creating a classroom and adding students
Classrooms are a great way of interacting with a group of students and teaching them. The classroom provides a space to learn and interact with each other.
After logging in as a teacher, your dashboard will be displayed; click on Classroom from the top panel.
All your existing classrooms, the ones you have previously created and those you were added to, will appear.

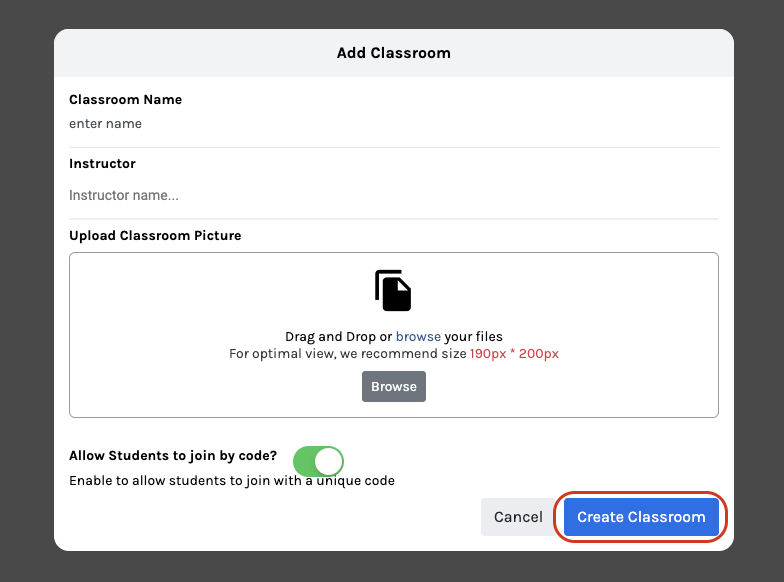
Click on the Create Classroom button.
Classroom Name: Name of your classroom, visible to everyone.
Instructor: You can add any number of teachers to your classroom by adding their names here.
Upload Classroom Picture: Drag-drop your picture or choose it from your computer by clicking the Browse button to upload.
Allow Students to join by code: Enables students to join the classroom with a unique code given to them by the teacher or the administrator.
Once finished, click on Create Classroom.

Congratulations! A classroom has been created. Now, let’s understand how you can personalize your classroom.
Students:
Click on Students from the menu on the left side of the screen.

There are two ways to add students to your classroom:
- Click the Add Students button to add their email/phone numbers.

- Alternatively, you can upload students by clicking the Upload button and uploading the data file.

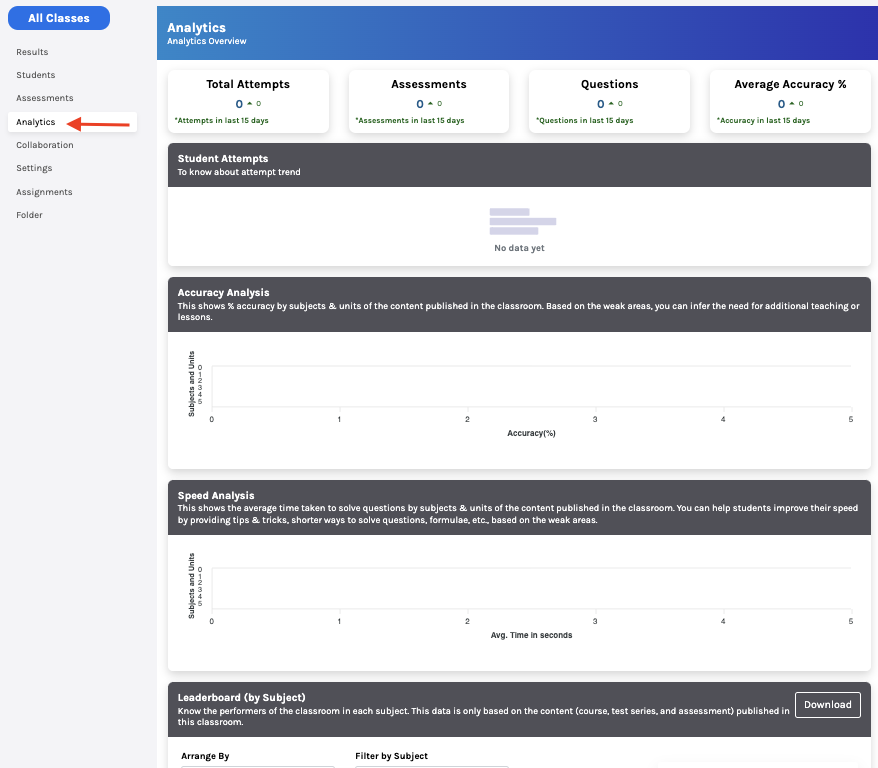
Analytics:
In this tab, you can view the detailed analytics of your class, for example, no. of inactive students, assessments.

Assignments:
Assignments are used to create small classroom tasks or practicals. While attempting assignments, students can also add media files to them.
Here, you can create new assignments.

Click on the Create Assignment button to create a new assignment.

Fill in the details of the assignments: Title, Due Date, Total Marks, and question. Next, you can choose Publish/Save.
Folder:
You can upload notes/teaching materials for your classes from your system. The uploaded material can be accessed from here.

Settings:
Detailed of the classroom can be edited from here.

More teachers/Instructors can be added. The classroom code can be accessed from here to share with students.
You may enable or hide some menu items shown in the image above.
Click on Save to update changes.

